Meta Title:
The Best Guide to Ironing Custom Patches on a Hat or a Cap
Meta Description:
Have a look on how to iron a patch on a hat, cap, or beanie the right way. Step by step guide with heat tips, fabric care, and long lasting results.
The Ultimate Guide on How to Iron a Patch on a Hat or a Cap
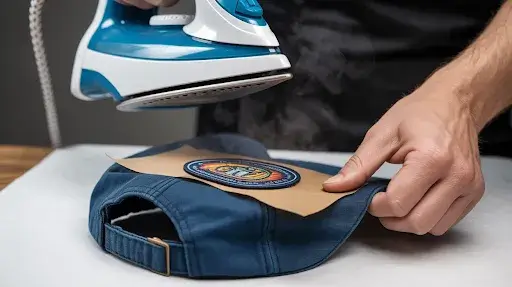
Alt text: Ironing a navy blue baseball cap with a brown paper sheet and circular patch on it.
Custom patch hats, caps, and beanies are the talk of the town for fashion, customisation and branding. However, it can be really tricky to iron a patch on headwear, because of their shapes being curved and rigid as compared to flat jackets or backpacks.
But nothing to worry about! This blog will be guiding you on how to iron a patch on a hat or a cap, the essential tools you would need, safe temperatures for every fabric, and a foolproof step by step process to make it easy for you, along with expert alternatives for heat sensitive materials. So, let’s explore the world of iron-on patches for your headwear!
Understanding What Iron-on Patches Are and Their Types
Ironing a custom patch onto a hat, cap or beanie is known to be a quick, easy, and cost efficient way of adding a personalised touch to your headwear without needing sewing equipment.
This process uses a heat activated adhesive backing, which melts and bonds with the fabric of your hat, cap or beanie when pressed with an iron. Below are some examples of types of patches that work well with the iron-on patch method:
- Custom Embroidered & Woven Patches: Embroidery patches are a classic raised texture while woven patches are for high detail clarity for complex logos, both can be easily ironed on your headwear. Although, avoid leaving them under the iron for too long as it can burn the patches.
- Custom Leather & PVC Patches: Custom leather patches give a premium, sophisticated feel. On the other hand, custom PVC patches give a rugged, waterproof 3D effect. Ironing these patches on your headwear require proper technique and lower heat to minimise chances of burning or damaging them.
- Custom Chenille Patches and Custom Sublimated Patches: Custom chenille patches give a fuzzy and vintage look. Sublimated patches are best for complex and realistic designs. Ironing Chenille patches should be done from the inside to avoid burning their fuzzy and floofy look while sublimated patches are better off with lower heat as overheating them can scatter their dye.
What to Look Out For Before Ironing the Patches on Your Headwear
Following are the important pointers to consider that would help you prepare for ironing patches on your headwear:
Understanding the Patch Type:
Check the type of your custom hat patches, make sure they do have a heat activated backing. While custom embroidered patches are easy to iron on, custom leather patches or custom PVC patches may require specialised adhesives or in some cases sewing to avoid the damage heat can cause.
Considering the Patch Material:
Check your headwear’s fabric materials beforehand. Cotton and polyester are best, as heat sensitive nylon or straw can melt because of heat.
Structuring and Placement of the Patch:
To get a professional look, centerise your custom patch for hat placement on the front, you can also go for a trendy side panel or instead a back strap position on your custom patch headwear.
Tools Required for Ironing the Patch on Your Headwear:
To get a clean, durable bond for your custom iron on hat patches, you need following essentials for best results:
- Household Iron or a Heat Press: Set to dry and no steam setting. Moisture can be a damaging factor to your headwear or your patch attachment.
- Pressing Cloth: A thin towel or a parchment paper is used to protect the fabric.
- Hat Form or Rolled Towel: To maintain the curved structure during pressing and avoid crumbling.
- Heat Resistant Tape or pins: To secure the custom hat patch in the desired place before ironing.
Step-by-Step Guide on How to Iron a Patch on Your Headwear
Custom patch hats with iron-on patches can be made easily by following the steps below:
Step 1:
Put your custom hat patches on the desired spot. Make use of heat resistant tapes or pins to secure the patch, so it does not slide off the curved surface of your headwear.
Step 2:
Stuff the inside of the hat, cap or beanie with a rolled up towel or use a hat form if you have it. This will help create a firm, flat surface and prevent the structured front from crumbling when pressure is applied on it.
Step 3:
Use a thin pressing cloth or parchment paper over the custom iron-on hat patches. This will be preventing any burns on the hat fabric and will protect the delicate threads of the custom embroidered patches.
Step 4:
Set your iron to medium high heat with no steam. Press down with firm, steady pressure for 30 to 45 seconds for secure attachment. Avoid sliding the iron. Hold the iron still to make sure the adhesive melts properly.
Step 5:
Flip the hat over and also iron the insides of the fabric directly behind the patch, for another 15 seconds. This melts the glue deeper into the hat fibers for a more permanent bond.
Step 6:
Let the hat sit still for 5 to 10 minutes. If you test the edges before the adhesive has fully cooled down, it can ruin the bond.
Expert Advices for Your Specialised Headwear
Ironing patch on a specialised hat or a beanie? Remember different materials require specific care to make custom patches for hats remain permanently attached to your specialised headwear:
- Custom Leather Patch Hats: To avoid burning or discoloring, always use a lower heat setting and a thick pressing cloth.
- Mesh & Trucker Hats: Custom patch trucker hats require extreme care with the plastic mesh. Heat will warp or melt the back panels instantly so the iron should only touch the front crown.
- Beanies & Knits: For ribbed or knit beanies, use a custom chenille patch or embroidered style. Avoid excessive pressure, which can flatten the knit and press the inside of the beanie firmly to make the glue lock deeply into the yarn fibers.
- Heat Sensitive Synthetics: If your cap is made of nylon, avoid the high heat. Instead use a hair straightener for targeted application on the patch only, or DTF transfers that are designed for low temperature bonding.
Aftercare and Washing Tips for Headwear with Iron-on Patches
If you want your custom patch hats to maintain their professional look, after ironing do not wear or wash the headwear for at least 24 hours. The resting period allows the adhesive to fully secure and bond deeply with the fabric fibers.
For long term durability, always hand wash in cold water with a mild detergent, because the high heat and agitation from a washing machine will lift the edges of the custom iron on hat patches.
If your iron-on patch hat needs drying, do not place them in a dryer. Rather air dry them on a flat surface. For custom leather patch hats, avoid soaking the patch itself. Just simply wipe the fabric sections with a damp cloth for the leather to prevent the material from getting stiff or start cracking over time.
Why are Iron-On Patches Better for Your Headwear?
Let’s have a look on the reasons ironing is the top choice for putting patches on your headwears:
FeatureWhy It Suits Hats, Caps and Beanies
| Interior Comfort | Reduces bulky thread knots inside the crown, prevents forehead irritation. |
| Aesthetic | Provides a built in look for custom leather patch hats and flat embroidery. |
| Application Speed | Ideal for custom patch trucker hats, takes only about 60 seconds per unit. |
| Durability | Modern adhesives bond deeply into cotton and knit fibers for a durable hold. |
| Precision | Easier to align custom hat patches on structured caps as compared to using a needle. |
Beyond the Iron: Alternatives For Headwear Patching
Ironing patches is not always the best tool for every case scenario, like for heat sensitive custom leather patch hats or delicate mesh. Mentioned below are the top professional alternatives you can go for instead of iron-on patches:
- Fabric Glue or Adhesive: If going for materials like nylon or straw that melt easily, high quality fabric glue is best. It gives a flexible, permanent bond for custom PVC patches without burning the fabric. Just apply a thin layer, position your custom hat patch on, and let the patch bond for about 24 hours.
- Traditional Sewing: For custom hats with leather patch designs, sewing is considered to be the gold standard. A simple running stitch around the border makes the patch durable enough to never peel off, even when heavily used. This makes it the most reliable method for custom patches on hats that would go through extreme weather or frequent washing reducing the wear and tears.
FAQs
Would ironing a patch on a hat actually stay on the hat?
Ironing a patch on a hat with proper techniques and good quality materials would make the patch actually stay on the hat for a couple of years.
How long does an iron-on patch stay on?
Traditional iron-on patches can last between two to three years, with some maintenance.
How long does it require to iron a patch on a hat?
Ironing a patch on a hat takes approximately 45 seconds for a strong and firm hold.
Do the iron-on patches fall off easily?
Iron-on patches do not fall easily if attached properly with good quality materials and kept maintained.
Customise Your Headwear with Iron-on Patches Now
It is agreeable that iron-on patches are the best go to choice for hats and caps. They are quick and cost friendly, as you can iron a patch on your headwear with ease at home.
So, if you are looking for a UK based trusted Patch maker with years of excellence and exceptional quality control then look no further! Eagle Patches UK is the best patch maker in the UK, with thousands of satisfied customers.
Ready to iron patches on your hats or caps? Inquire now for a free consultation.