Making a custom embroidered patch from scratch is a process that rewards every person who understands it fully, whether you are a hobbyist finishing a single design, a clothing brand building a product range, or a UK sports club producing kit badges for a full season. The steps are logical, the materials are accessible, and the results speak for themselves.
The honest truth is that DIY patch making is absolutely possible at a basic level, but high-fidelity results, the kind that look retail-ready, hold their shape through years of washing, and reproduce a complex logo with sharp thread accuracy, require specific hardware, professional software, and production techniques that go well beyond a home sewing machine and a good intention.
Designing for Embroidery: Digitising Your Logo
The first thing most first-time patch makers get wrong is assuming they can feed a JPG or PNG file directly into an embroidery machine and get a clean result. Embroidery machines do not read image files. They read stitch files, and the process of converting your artwork into a stitch file is called digitising.
Why Image Files Do Not Work
A JPG or PNG is a grid of pixels. Each pixel carries colour information but no instruction about direction, density, stitch type, or thread sequence. An embroidery machine needs to know exactly where each stitch starts, which direction it runs, how dense the fill is, and in what order each colour section stitches. None of that information exists in an image file.
What Digitising Does
Digitising takes your artwork and maps out every stitch path the machine will follow to reproduce your design in thread. A professional digitiser makes decisions about stitch type for every section of the design.
Satin stitch for borders and lettering. Fill stitch for large colour areas. Running stitch for fine outlines and detail work. Each decision affects how the finished patch looks, how the thread lays, and how the design holds up through washing and wear.
The two most widely used stitch file formats are DST, which works across most commercial embroidery machine brands, and PES, which is specific to Brother machines. Always confirm which format your production equipment requires before digitising begins.
Software Options
Professional digitising software includes Wilcom, Hatch, and Tajima DG. These are industry-standard tools with steep learning curves and significant licence costs. For most small brands and clubs, outsourcing digitising to a specialist is more cost-effective than purchasing and learning professional software for occasional use.
A single high-quality digitising job on a logo costs a fraction of the software investment and produces better results than a first-time user working with professional tools.
Choose Your Patch Material and Base Fabric
The base fabric forms the backbone of your patch, influencing its texture, weight, and overall durability. Picking the right patch material early ensures your design stitches out cleanly, feels premium in the hand, and performs well in its intended setting—whether that’s sports kits, jackets, bags, or awards.
Here’s a breakdown of common patch fabrics and their best uses:
| Fabric Type | Description | Best For |
| Twill | Smooth, tight weave; classic embroidery base | Sports patches, jackets, bags |
| Felt | Soft, textured surface; thicker appearance | Vintage designs, small craft patches |
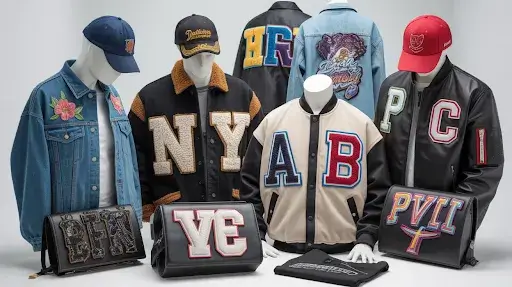
| Chenille | Plush, fuzzy surface; dimensional effect | Letterman jackets, varsity patches |
| Canvas | Heavy-duty, coarse texture | Outdoor gear, workwear patches |
| Leather | Strong, premium feel; hand-stitched only | Custom badges, high-end fashion |
Choosing the right base fabric at the start saves time, reduces stitching issues, and ensures the final patch looks and lasts exactly as intended.
The Production Phase: Stitching and Stabilisers
With your stitch file ready and your base fabric chosen, the production phase begins. This is where design intent becomes physical reality—and where the two most common DIY patch issues, puckering and misregistration, often originate.
Key considerations during production:
- Choosing the Right Stabiliser: Stabilisers support the fabric during stitching. Tear-away stabilisers work well for firm fabrics, while cut-away stabilisers are ideal for stretchy or lightweight bases. The wrong stabiliser can cause puckering or distortion.
- Hooping Correctly: Proper hoop tension keeps the fabric flat and evenly stretched. Too tight or too loose can shift the design or create unwanted folds.
- Thread Tension and Type: Adjust machine tension for the specific thread and fabric combination. Polyester thread is standard for durability; specialty threads may require minor tension tweaks.
- Monitoring Stitch Registration: Ensure design elements line up as intended. Misregistration, where parts of the design shift, can ruin small details like lettering or intricate borders.
- Test Swatches: Run a sample patch before full production. This helps identify and correct puckering, colour bleed, or alignment issues without wasting the full batch.
- Machine Maintenance: Clean needles and check machine calibration regularly. Even minor machine issues can affect stitch quality and consistency across a run.
Finishing Techniques: Laser Cutting vs Manual Trimming
How you cut the finished patch determines the quality and consistency of the final edge. Both methods are used in UK patch production, but they deliver very different results.
| Feature | Laser Cutting | Manual Trimming |
| Edge Quality | Sealed, fray-proof, perfectly consistent | Variable, skill-dependent |
| Speed | Full batch in one automated pass | Each patch trimmed individually |
| Complex Shapes | Handles any outline with full precision | Difficult on tight curves |
| Fraying Risk | None, heat seals the edge instantly | Present without border stitch or Fray Check |
| Retail Readiness | Immediate, no finishing required | Requires additional finishing steps |
| Best For | Production runs, wholesale, retail merchandise | Single pieces, simple shapes, home DIY |
FAQs
Can I use a standard home sewing machine to make patches?
Standard domestic sewing machines are not capable of the high-density satin stitch coverage that professional embroidered patches require. Embroidery patches need a dedicated embroidery machine with a hoop system, multi-needle capability, and stitch file compatibility.
How do I ensure my patch does not fray after cutting?
Two approaches work reliably. A merrowed border stitch wraps the outer perimeter of the patch in a looped overlock stitch that acts as a natural fray barrier and a clean visual border simultaneously.
Why does my patch look bubbled or wrinkled?
Bubbling and wrinkling in the stitched surface almost always trace back to two causes: inadequate stabilisation or incorrect hoop tension during production. Without proper stabiliser support, the base fabric distorts under needle tension and produces the puckered surface you describe.
Does Eagle Patches UK offer assistance with design files?
Yes. Eagle Patches UK provides full digitising support on every order. Whether you are working from a hand-drawn sketch, a finished vector file, or an existing logo in any format, the team converts your artwork into a production-ready stitch file that reproduces your design accurately at your specified patch size and stitch specification.
Get Retail-Ready Results with Eagle Patches UK
DIY patch production teaches you exactly how much precision goes into a finished patch that looks and performs at a professional standard. Eagle Patches UK handles every step from digitising and stitching through to laser cutting and backing application, so your patches arrive retail-ready, fray-proof, and consistent across every unit in your order. Request a design proof from Eagle Patches UK today and see your artwork in thread before full production begins.